Hand-mitre saws and a mitre box aren’t just an essential for woodworkers, they’re one of those tools that everyone should have. We’re talking hammer and nails, meat and two veg territory.
Mitre saws are designed to cut angles, while mitre guides / gauges and fences securely hold the workpiece in place. They’re essentials for any woodworker that needs to cut wood accurately or on angles…so any woodworker.
Mitres may be ubiquitous but they’re certainly not simple (and not just because you have to remember high school trigonometry). Not only do they have a massive impact on the quality of your work, which makes choosing quality items important, but they also vary wildly in price.
This means if you get sucked into over-speccing for your project, you could get ripped-off. No matter how much you pay, you’ve also got to set them up properly and check their accuracy.
In short, they’re worth a blog or two, so here's our hacks, tips and tricks!

The bare basics of mitres (and woodworking)
Before we get into the more complicated stuff, it’s worth taking time for a recap of what mitres are, including the terminology and the tools involved. If you’re an experienced woodworker you can skip ahead.
First you’ve got your cuts:
- A mitre is an angled cut, specifically referring to a 45-degree cut (two of which, when joined, form a 90 degree or right angle).
- Rip cuts are cuts that form along the grain
- Cross cuts across the grain.
- Bevelled cuts are angles cut on the edge or end of a piece of timber
- A compound cut is a bevelled cut and a mitre cut combined
- A chamfer is a 45-degree angled edge, such as a table corner.
You also have a myriad of options for cutting and measuring mitres, which vary in price, accuracy and complication – powered saws (compound saws, sliding mitre saws), hand saws, mitre boxes, set guides, try squares, mitre squares…the list goes on.
Trys and Mitre Squares
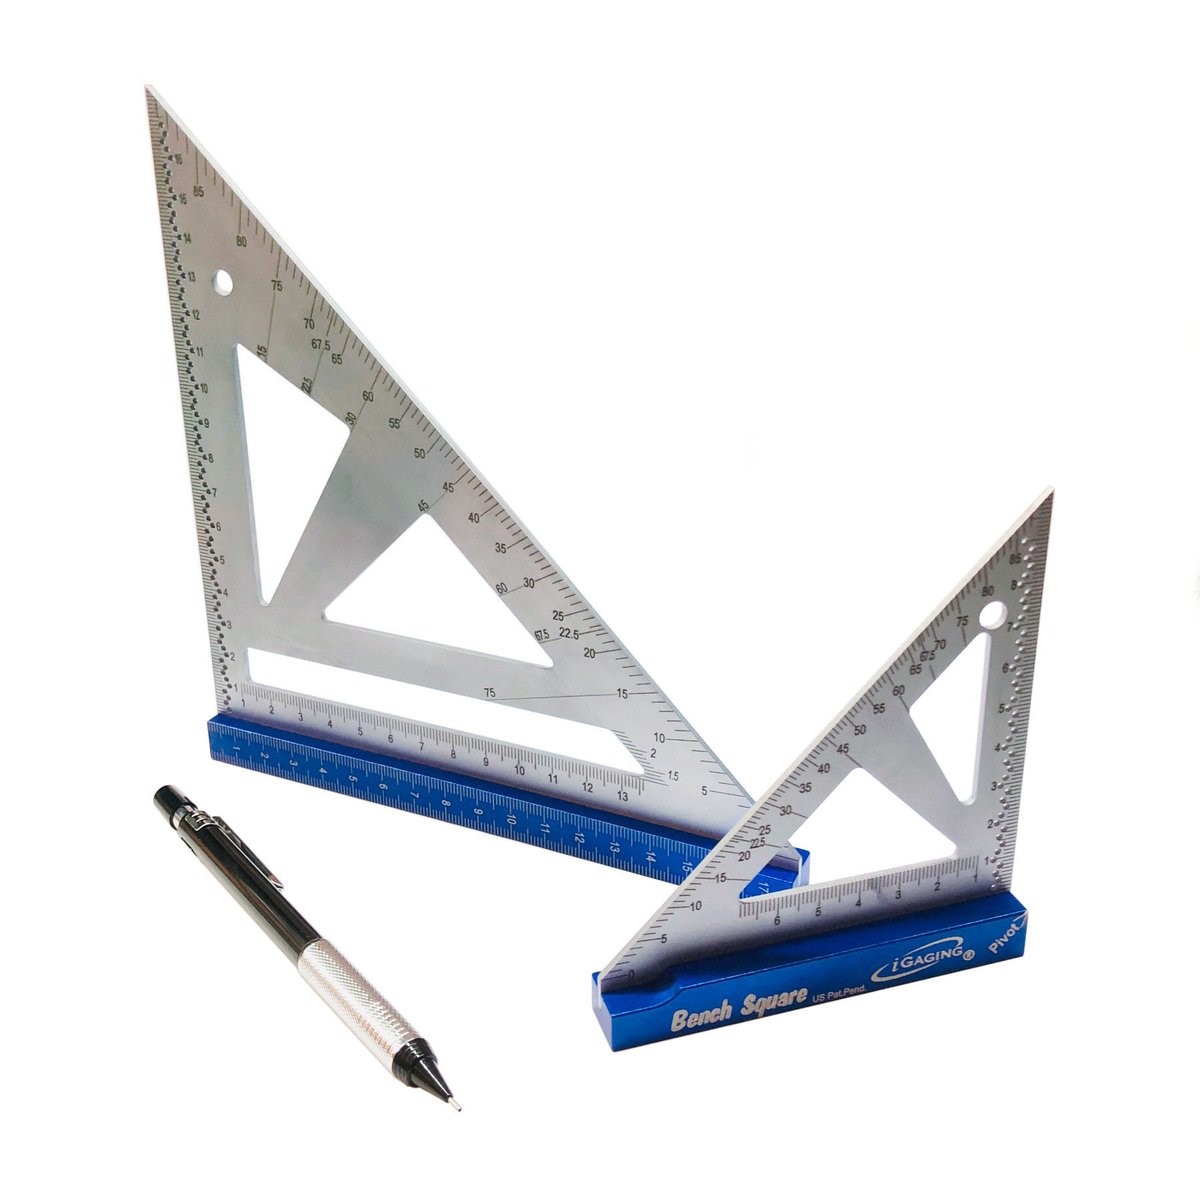
Like any square, try and mitre squares are square units for measuring and drawing up angles. They consist of a stock - that has a metric and imperial scale for measuring - and a blade.
The try squares are set at 90, while the mitre squares are set at 45-degrees, for marking the angle of a mitre joint.
Hand Mitre Saws
Hand-mitre saws and a mitre box aren’t just an essential for woodworkers, they’re one of those tools that everyone should have. We’re talking hammer and nails, meat and two veg territory.
A mitre box is a plastic or wooden box with slots cut at specific angles for angled or bevelled cuts. They vary in size and number of angles offered, with the narrower the channel, the simpler the projects.
Some hand mitre saws also offer excellent compound cutting abilities.
Power Mitre Saws
Power mitre saws have advantages in speed, versatility and accuracy, however cost more and can be more complicated to use.
Compound mitre saws will allow you to quickly and easily cut bevelled edges on the end of your timber for small joins, while also cutting mitres and cross cuts.
Sliding compound mitre saws slide along rails, allowing you to expand the blade’s reach and cut wider pieces.
Mitre Guide...Guide
(How to set up, use, choose, measure and get the best out of your mitre guide)
For a stiff, straight bit of metal, Mitre guides (or gauges) are actually pretty flexible little units. A great mitre guide or mitre sled can turn a lumbering table saw into a nifty cross-cutter and if you find one specialised to your needs, they can be cost effective as well.
Just to recap, the mitre guide is the long, thin metal guide that fits in the mitre slot of your table saw, bandsaw, etc. Many guides have a pivot point, allowing them to move to any angle between 45 and -45 degrees and some have nifty ‘positive stops’ allowing you to quickly access the most commonly used angles.
P.S. With most mitre guides, if you’re after a specific angle outside of these stops you simply pull the handle, release the pin and move the gauge to the desired angle.
It’s the 21st century so you can now also buy machines that offer these measurements electronically, but we’ll come to that later.
The nitty gritty
 It’s at this pivot point where you have the protractor attached, allowing you to keep track of the angle. The part of the guide that you place your workpiece against is called the fence – you place your workpiece against the fence and slide it through the saw blade, allowing you to cut it on the perfect angle.
If you’re looking for a guide, the average mitre slot measures in at about 19 x 9.5mm, although if you’re uncertain, it’s worth finding the callipers and giving yours a check. While you can make your own mitre guides and there are a few decent tutorials out there, if you stuff up it defeats the purpose.
It’s due to their importance that mitre guides can vary so spectacularly in price. The best in the business can cost hundreds of dollars (precise to a fraction of a degree) although admittedly, it’s hard to imagine even the most dedicated woodworkers spending such an exorbitant amount on a mitre guide when Incra guides can provide similar accuracy for way, waaay less.
On the other end of the spectrum, a rubbish mitre guide - like the stock ones we’ve all received with some old machinery – are oxymoronic. This is why it’s important to check your mitre guide’s accuracy.
How to choose a good mitre guide?
Once you’ve decided which level of accuracy you require, the next step is figuring out the features you’re after that will make your jobs a lot easier. If you need a fraction of a degree of accuracy, the Incra guides are a time-tested, world-renowned solution, but you’ll still pay a premium price.
For hobbyists and all other levels of woodworker that don’t need quite that level of accuracy, there are fantastic value options on offer.
- Look for powdercoated, steel protractors with CNC cut gauges that won’t wear the minute you chuck them on a workbench, otherwise you’ll end up with a mitre guide with measurements that you can’t read.
- The positive stop feature is also a massive time saver – the more of these defaults the merrier.
- Check that the flip-stop secures properly; it’s a sign that the guide is well made. Anodised metal is another.
- Unless you love conversions, you may also want to ensure your guide has an imperial and metric fence.
Shop Mitre Gauges Now!