Creating consistent, curved timber components by hand can be time-consuming and prone to error. In this guide, we explore how to use template routing to shape identical table legs from timber blanks. It’s a fast, accurate method that reduces waste and, when done correctly, avoids tear-out altogether.
Designing and Creating the Template
The process begins with designing the desired shape digitally or manually, using precise measurements to map out curves and dimensions. These details are transferred onto a sheet of MDF, which becomes your template. Unnecessary lines are removed, and the shape is cut out using a bandsaw or similar tools. The key here is refinement, sanding and smoothing the template ensures clean transitions that will be mirrored in the final timber pieces. A well-made template forms the backbone of this technique, allowing you to replicate the same shape across multiple blanks with precision and efficiency.
Preparing Timber Blanks for Cutting
With the template ready, attention turns to the timber. The MDF template is affixed to each blank with a reliable temporary bond, blue painter’s tape and CA glue (superglue) work well together for this. Tape is applied to both surfaces, with glue placed between to form a strong but removable hold. This ensures the template stays firmly in place during cutting, without leaving permanent marks or damaging the timber surface.
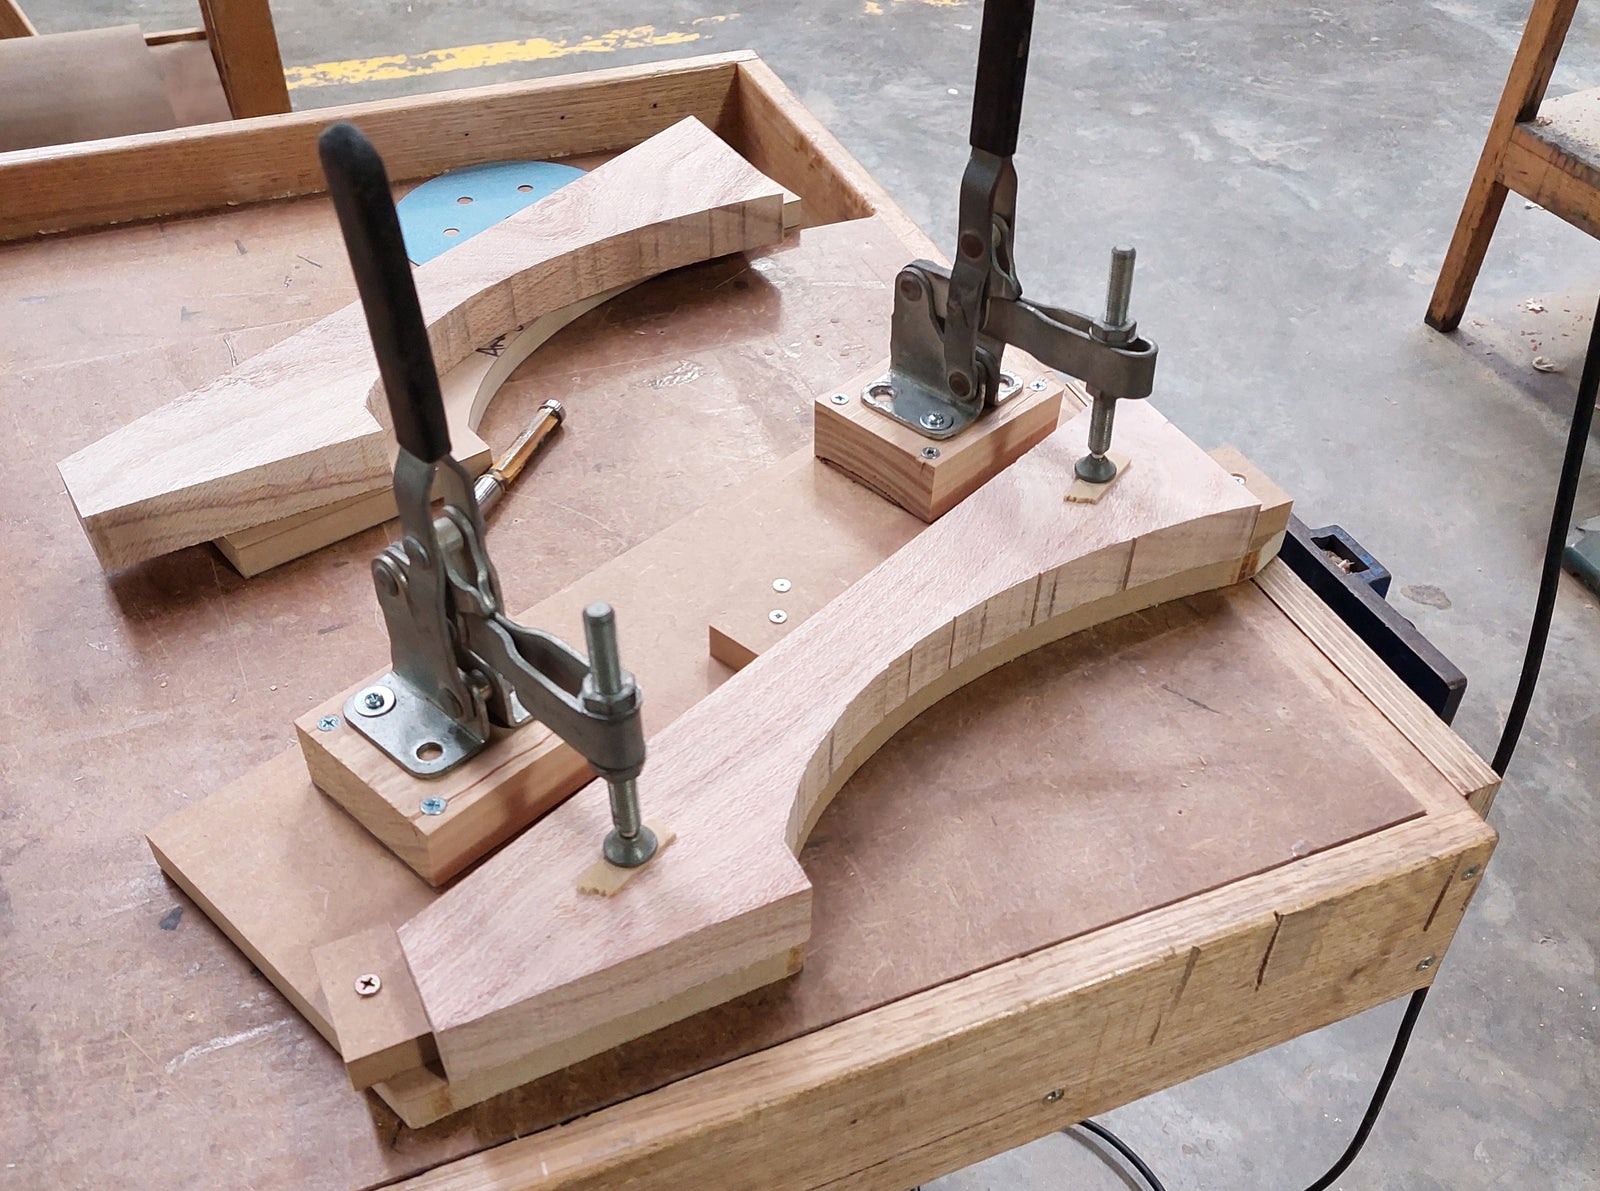
Another method is to create a base or extended area of your jig, and use hold down clamps to secure your workpiece. Gluing strips of sandpaper to the base of the jig can help your workpiece from sliding before being clamped.
Smart Cutting: Minimising Waste and Maximising Accuracy
Before routing, it’s best to remove as much excess material as possible. External curves can be quickly cut with a bandsaw, while internal areas may require a jigsaw. The goal is to stay just shy of the template line, close enough to reduce the load on the router bit, but not so close as to risk cutting into the final shape. Reducing waste early leads to a cleaner routing pass, with less tear-out, lower tool stress, and improved accuracy. In complex areas, cutting in stages or using a drill press to relieve corners may be helpful.
Routing with Precision: Choosing Bits and Avoiding Tear-Out
Routing accurately and cleanly depends on choosing the right bit and understanding grain direction. A double-bearing flush-trim bit is ideal, allowing you to switch the bearing from top to bottom by flipping the workpiece or adjusting router height. This flexibility is crucial when routing with the grain rather than against it, cutting "downhill" avoids tear-out, where fibres are ripped instead of sliced cleanly.
Before routing, mark the timber to indicate safe directions and danger zones. In some cases, using a climb cut (routing in reverse) is beneficial, but it requires experience and control. Take shallow passes rather than removing all the material in one go. This reduces vibration, extends bit life, and significantly lowers the risk of tearing the surface. Routing with care and awareness is the best defence against mistakes that can be difficult to fix later.
Finishing Touches: Clean Shapes and Smooth Curves
Once routing is complete, the template can be carefully pried off. Because of the tape-and-glue method, the template is unharmed and reusable. What’s left is a perfectly shaped piece with clean, smooth edges and no visible tear-out. Final steps may include sanding, rounding over edges, and refining any transitions by hand.
This technique unlocks complex, organic forms without the need for CNC machinery, making it ideal for custom furniture making. With thoughtful preparation and precise execution, template routing transforms rough blanks into refined components, ready for assembly.